.
Lancia Stratos
Slotcar Kit
by Phil Wicks
Not sure why I got this model but it has been an endless trial of resourcefulness. Teamslot have tested me in the past but this one takes the cake. I first had the Teamslot experience with their Celica GT. That was enough to set a grown man crying but its pitfalls paled into insignificance compared to this model! The Renault Alpine was a dud, but after some hours at the remodeling bench I got it to behave like a real slotcar, so much so that I have done another two since for other slot racers. Both of which are now faster than mine!!
The Lancia (pronounced ‘Lancha’ in real Italian – meaning Lance.....of course!) came to me indirectly and without prompting. I had admired the Eggmeister’s Teamslot Stratos from afar, especially after a particularly good outing on the Clontarf track of local racer Alan, but I never made a move to buy one, instead, I would say to myself...â€Oh, there’s one!†every time I saw one on eBay. But fate would have it that one day I would be the owner of a Stratos..... and it would take me the best part of a three year love hate relationship before I would finish building it.
The model belonged to fellow slotista and scratchbuilder extraordinaire, Terry Cosgrove. He approached me one race night with the proposition of owning one of the kits he had purchased some time previous for a princely sum. With fate whispering behind me saying, “Go on son, bite his hand off!†I committed myself to the deal and the kit went home with me!
I spent a little while in time looking at the model and slowly diminishing the queue of scratchbuilds and repairs I had already in progress and finally the day came quite some time later when it was time to start the construction.......Well...... I kid you not when I say I have hated this model with a vengeance and am only now beginning to unmask its potential as firstly, a slot car, and secondly, a potential race winner on the right track, ‘a la Eggy’.
In case you are thinking bout getting one of these (until Mr Scaley can get his act together), there are a few things I think you should know!
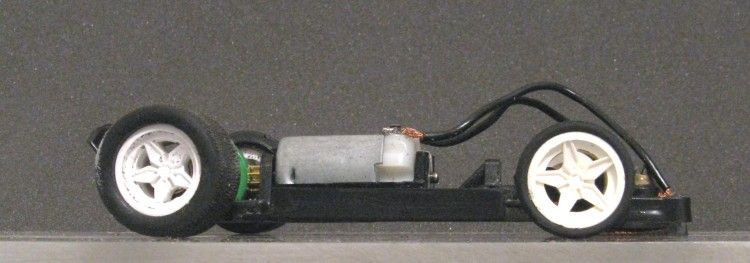
The motor sits in a pod, and the pod sits in the chassis, so the first task is to get all the bits that clip together to clip together! Clipping the motor in the pod saw the pod distort decidedly banana shaped. Someone’s slide rule must have been left out in the sun the day they drew this one up as the motor wedges itself relentlessly into the pod, leaving no way the pod will fit. After determining where the pod was tight I worked day and night with a dremel and rifflers until the motor snapped into the pod keenly and with a short rule I tested the base and lo, all was well! Next up was to get this assembly assembled in the sub assembly.
Popping the pod into the chassis it was plain to see that the pod was not happening either. The main problem being that the pod was a little larger in several places than the hole in the chassis, which is where it was supposed to go! Once again the dremel was cranked up and this time the rifflers AND the Xactos where called in to fix the second problem. but as we speak, this happened over a considerable period of time. Being once bitten I was off the job for a while.
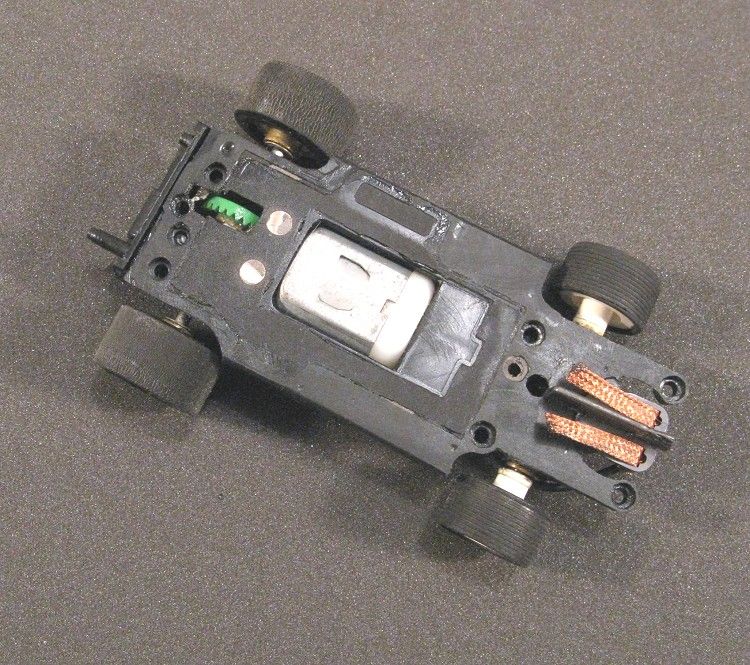
Eventually the motor, pod and chassis all married up into an almost flat platform, except, the chassis was not the flattest. On top of all this I was concerned about the integrity of the assembly. I had severe reservations about its structure and on lonely nights I could visualise the whole assembly springing apart unannounced in the middle of a titanic struggle for the lead in some far off future race. So I weakened, and to set my mind at rest I superglued the chassis parts together, left them for a couple of days and on returning I sanded the entire underside of the model flat!
Some good while later I was clearing the modelling bench and came across the chassis and bits under a pile of other stuff which had obviously taken precedence and was more of a joy to do, but forgetting my trials to date and obviously feeling full of spring I set about it once again. This time I thought I would snap the axles in place and set the guide up to get the chassis running before committing myself to the body work.
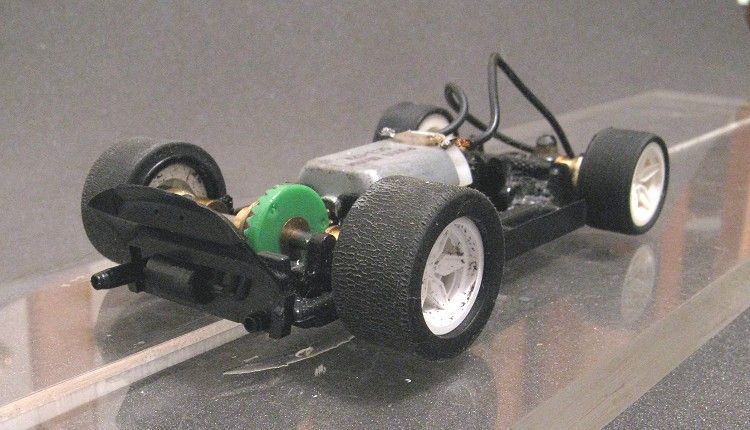
I snapped the rear axle in place and was surprised when I turned the axle. It bound fiercely with the pinion and no amount of coaxing would free it up!, even Doctor Phil’s patent remedy, Tamiya fine polish, could not get it to run smoothly. On turning the rear axle it was obvious that the contrate was badly distorted, possibly by forcing the axle through the too small a hole in the contrate, causing the gear to warp!! It took me less than a minute to remove the offending gear and toss it into the rubbish bin! Luckily I had a supply of the green twenty seven tooth SCX gears in stock and in a jiffy the gear was fitted to the axle and bearings. the only problem now was that having popped the rear axle in and out several times, the axle bushes had become decidedly, and prematurely sloppy in the chassis?? Damn and blast, with more important things to do like watch the lawn grow, once again it was left for dead!
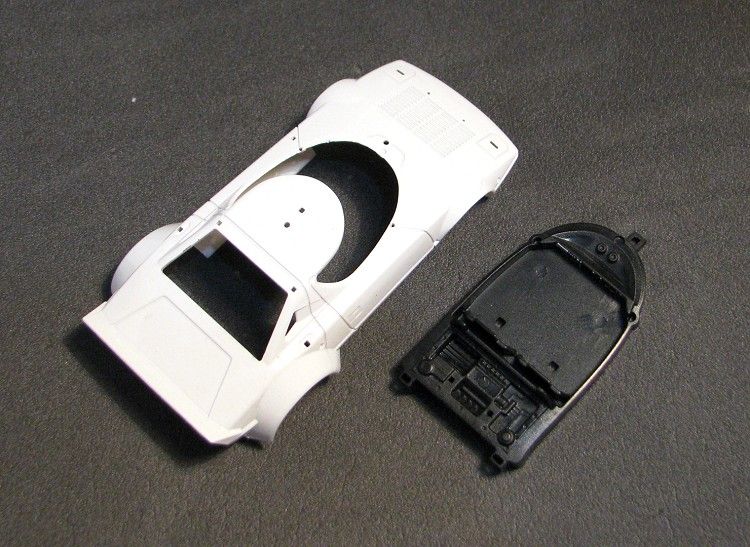
In another fit of misplaced enthusiasm again some while later, I decided to decorate the body. The body itself comes in a gloss white finish of dubious quality. The model also came with some Patto’s ‘Alitalia’ decals and they looked pretty schmick and I thought this would be therapy for me and this model. A chance to bond once again, forgive and forget, and maybe even send Mr Teamslot a Christmas card??.....WRONG!!
It was Mr Patto’s turn to cause me to doubt my abilities! The decal set was from Patto’s ‘screen printed’ era Not only where the decals thick and knobbly, they were like a piece of plastic, you could bend them one direction or the other, not both directions at once!! Unfortunately there was no part of the model with this feature? All the decals needed to cover the curves in both directions. But to give me credit, I tried everything. I tried Mr Soft’s decal fix and his softener, Nuh. I tried hot water and I even tried metho, but by now I had buggered half the decals and they went in the same bin as the gear did some months earlier!
Returning to the rolling chassis, again after a spell, I decided to glue the axle bushes in place, but before I could do that I needed to make sure the chassis was level and the body sat well on the chassis. As it happened the body posts are all different lengths, so the boy was not going to sit straight anyway! So, I decided to assemble the axle and fit it first. Lo and behold there came a thundering sound in the east and was heard by a great multitude! well, when I say in the east it was my garage, and you don’t need to know what the sound was.
But.... I couldn’t understand at first why the rear wheels were loose?? But it was soon revealed that both the hubs had split! I contemplated a lot of things and one being alloy wheels, but where would I get the distinctive Lancia wheel inserts from? By now I was already committed to martyrdom and decided to repair the wheels. I worked some superglue into the slit in the hubs and then kept the slit tightly pressed closed for twenty or thirty seconds. Once glued, I trimmed two short lengths of snug fitting brass tube and glued them over the hub boss. Once cured, the axle holes were cleaned out and the wheels set up and glued in place back on the axle!
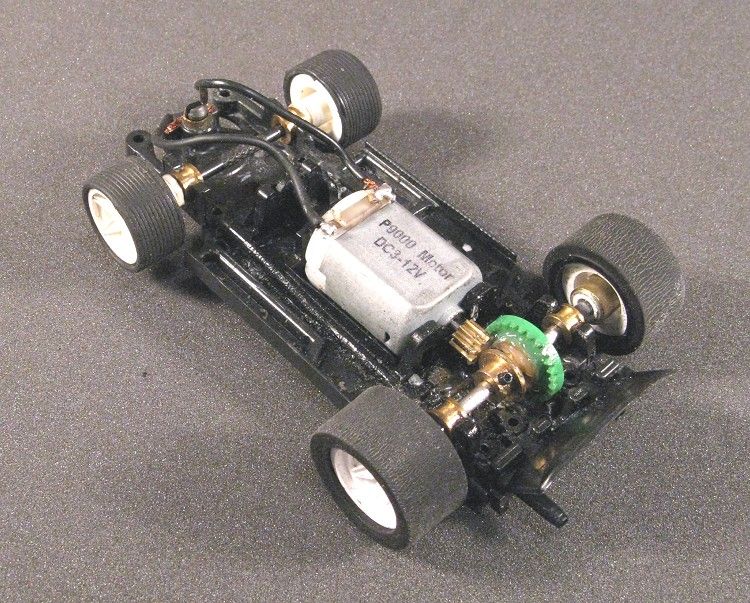
Returning the axle to the model I sat the chassis level on some thin plastic shim until the axle bushes were in an acceptable position in the chassis. I then offered the body onto the set up to make sure there was enough wheel clearance. Once happy, the rear axle bushes were committed with superglue, and a point of no return was reached! For once something went right. Using the same technique and with the guide in place to set the chassis height at the front I fixed the front axle in using the same methods. Hoooray!! I now had a model which actually sat firm and even on the test block!
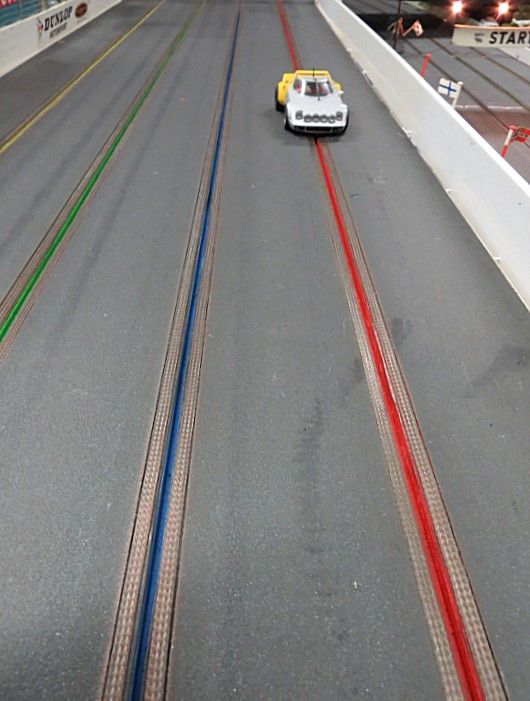
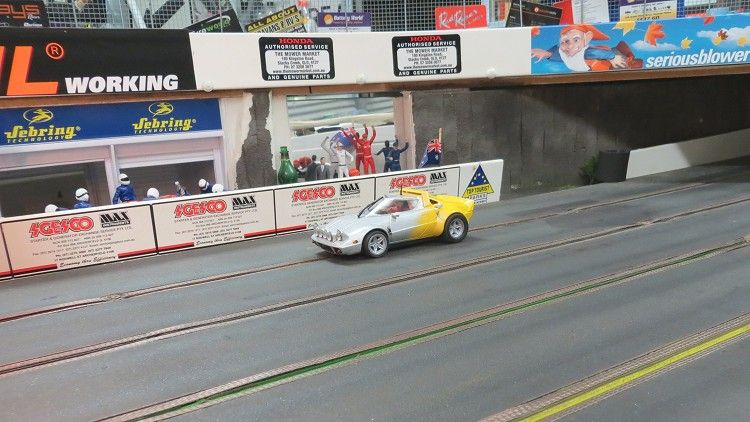
This was a milestone, the chassis was potentially a runner and I needed somewhere to run it, so, on a test and tune night at the LCR I took the chassis along and spent some little while setting it up. I use the term loosely as it was obvious from the start that this dainty, petite model had the motor from hell in it (much like the real car) and getting it to do anything other than slam itself into the fencing at the end of the straights was proving irksome! I remembered a deep and meaningful phrase from Confucius’ book of wisdom regarding slotcar motors... it went something like “when in doubt, rip it out!†So that’s what I did. Out came the motor and in went a Dick Smith special which is about an NC1 and a quarter as a temporary measure.
To cut a long story short the rear tyres went the same way as the gear and the decals. Team slot tyres go rock hard at the smell of an oily rag and it would have been senseless to have set off with them. Having a huge box of MJK’s the nearest and best was selected and placed on the rims. With a little sanding the tyres assumed the desired diameter and once again the model was taken for some more T&T! The final upgrade was to put the guide with the decals and the rear tyres and the contrate!! A Ninco guide was sourced from the spares reserve and a matching length of brass tube was cut, the guide hole counter bored and the tube inserted and glued in place!
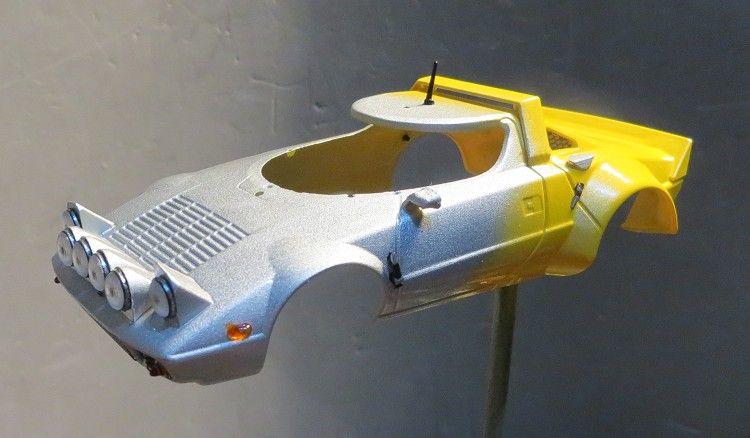
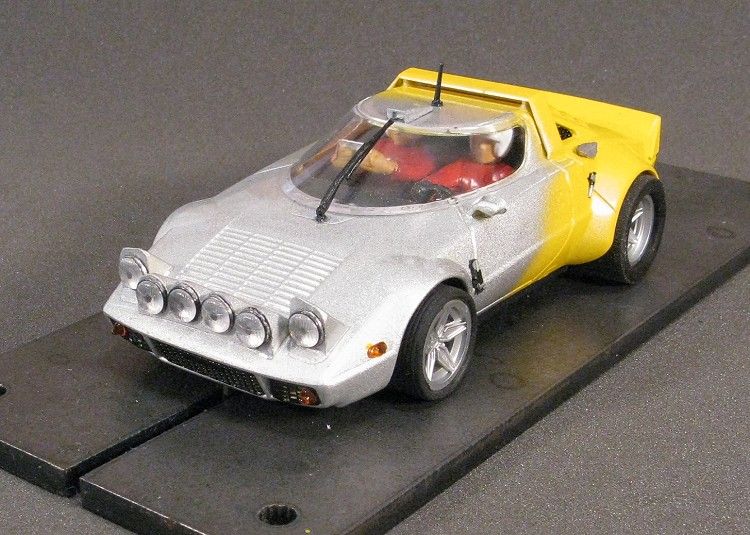
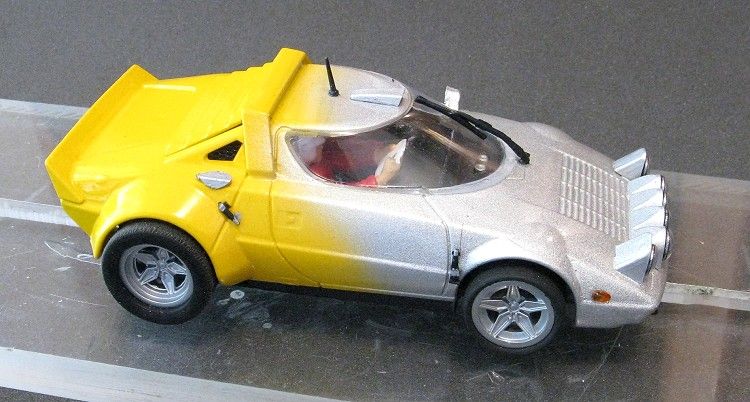
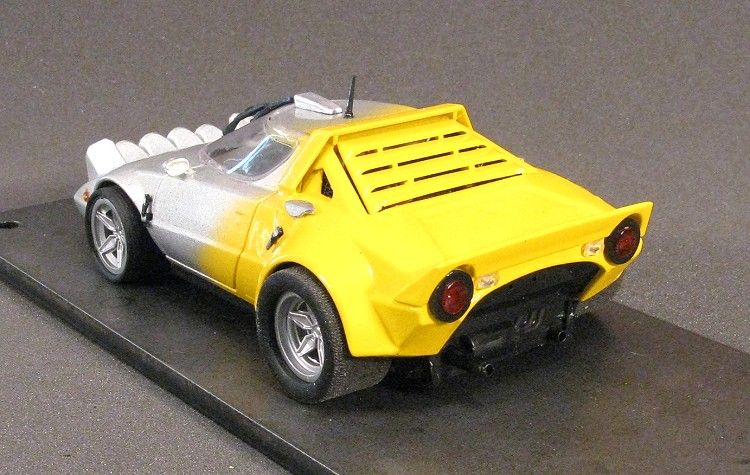
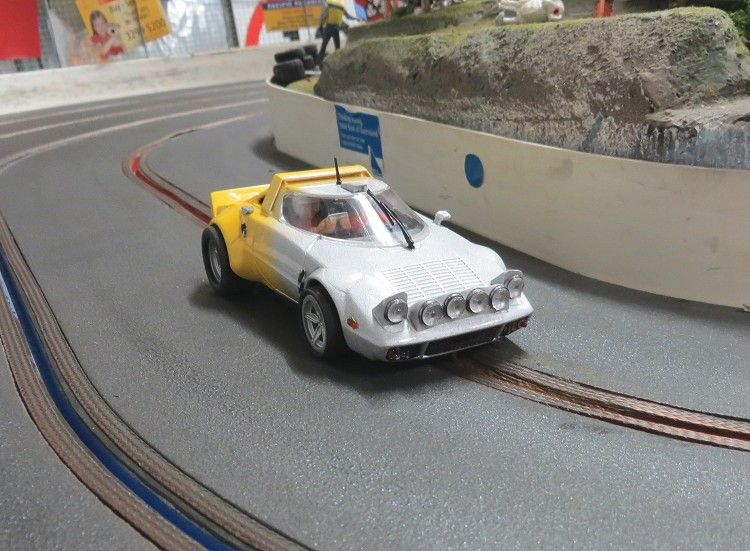
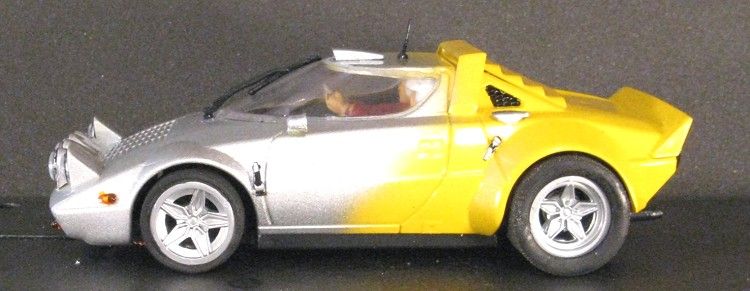
Could this be true, is it going to work, well I had the chassis doing some respectable laps and could only conclude that with the body on it could only improve.....and I was right! Flushed with success and after a coupe of years progress it was time to finish the body! The body was not going to be decaled in a Stratos livery, instead I would paint it in the Wixwacing trademark silver and yellow!
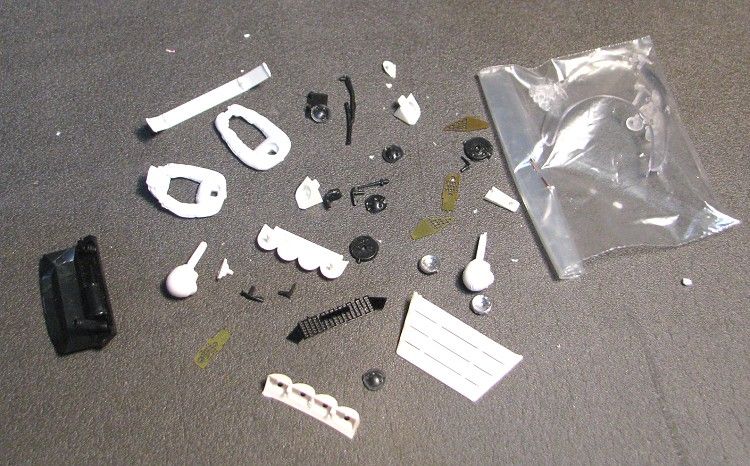
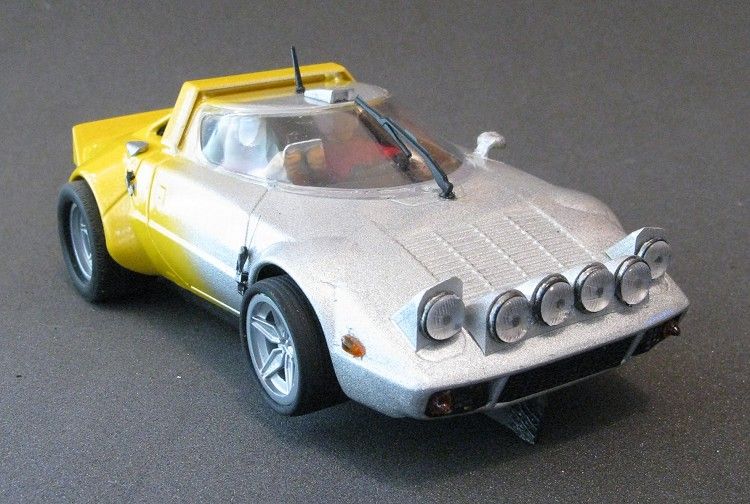
The body itself needed careful surgery on the body posts, a couple where shortened and the lone rear one had to be evened up on the end to stop the body twisting when the screw was tightened. This done I primed the body and with the wind in my sails I spent many a joyous evening just doing a little at a time, softly softly catchy monkey! The kit is quite detailed i.e there are a lot of bits to stick on it! The front lights are made up of twelve pieces, all fiddly, and all hard to find if you drop them on the garage floor, trust me!
Other bits like the side repeater lamps, the photo etched grilles and the rubber catches which hold the front and rear of the car down on the real model. the rear light backing and reverse lamps and least of all the door mirror. All these things need to be cut to a finished shape and size. The holes they sit in have to be opened out as the paint has closed the holes up. And then there are the front grilles! These need the ends folding back, and the grilles need to be glued carefully in place. I used superglue again as the model had a coat of paint.
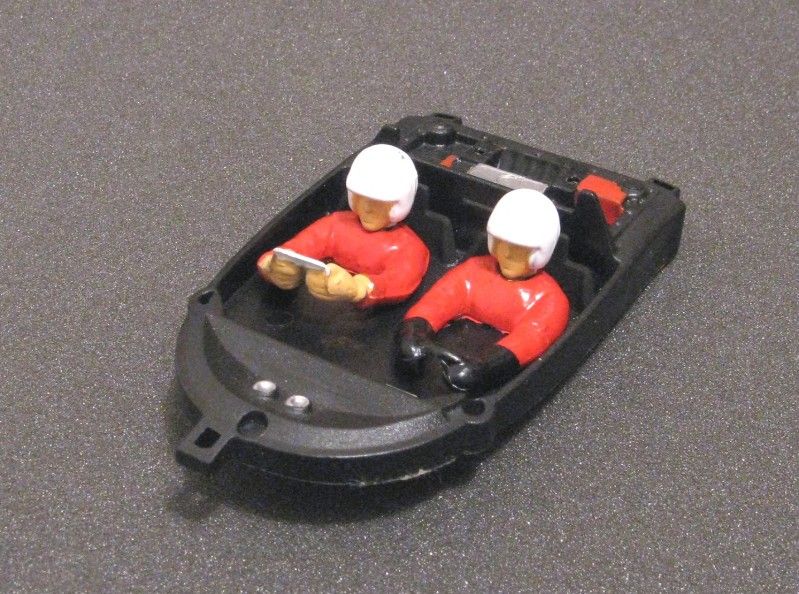
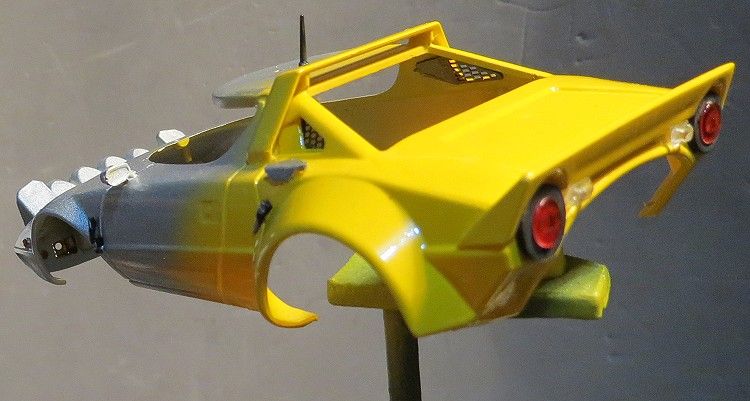
The driver’s tray preparation was quite easy, paint it if you want and give the driver and his mate a celebratory coat and glue the rear louvre onto it. This will need to be offered up in place while it sets to ensure it fixes in the right position. Once the driver’s tray and the body were complete it was time to fit them together, simple, slot the tray in and check for clearances......Uh Uh! Not so fast Wixwacing!! The tray wouldn’t go completely home, damn and blast, and everything painted too!! The trouble was the driver and navigators heads were touching the inside of the roof!! and holding the tray out by more than a millimetre, and worse still, with the chassis offered up the motor wedged against the underside of the drivers tray and wouldn’t go right into position.
Desperate times call for desperate measures and the measure I took, although desperate, could not be detected from outside the model! My fix was to boot up the dremel up with a grinding disc and grind the offending millimetre or so off the top of the occupants heads!! Problem solved and you couldn’t tell!! So the driver’s tray was eventually glued in place and looked very smart
Lastly, the screen went in. The holes in the body were cleaned of paint and the screen offered into place. Once a simple easy fit was achieved it was time to glue the screen. No polystyrene cement or superglue for this, because if you do, you will see a cloudy shadow appear most noticeably on the clear part and undo all that good work that has gone before. In this case I mixed some super clear epoxy and painted it carefully along the joining faces of the screen and the body opening. It was lowered into position carefully and once in place, pressed gently so the glue beads made contact with each other, ensuring a permanent fit!
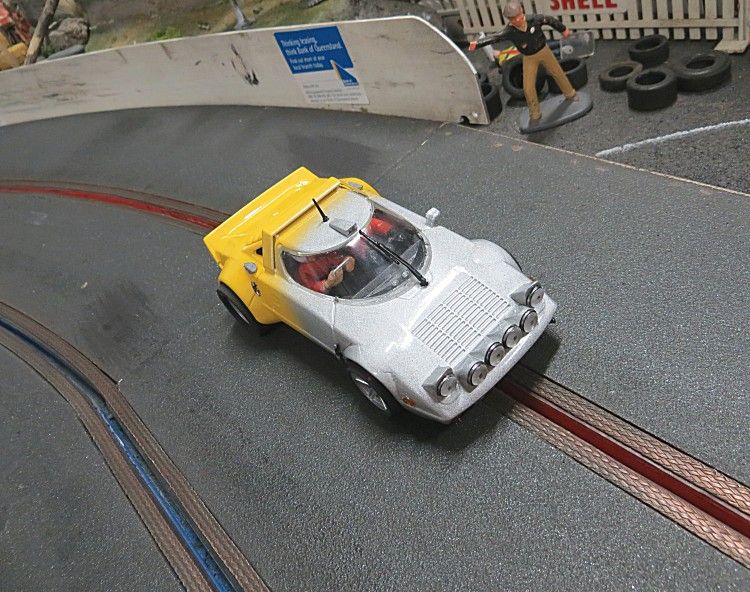
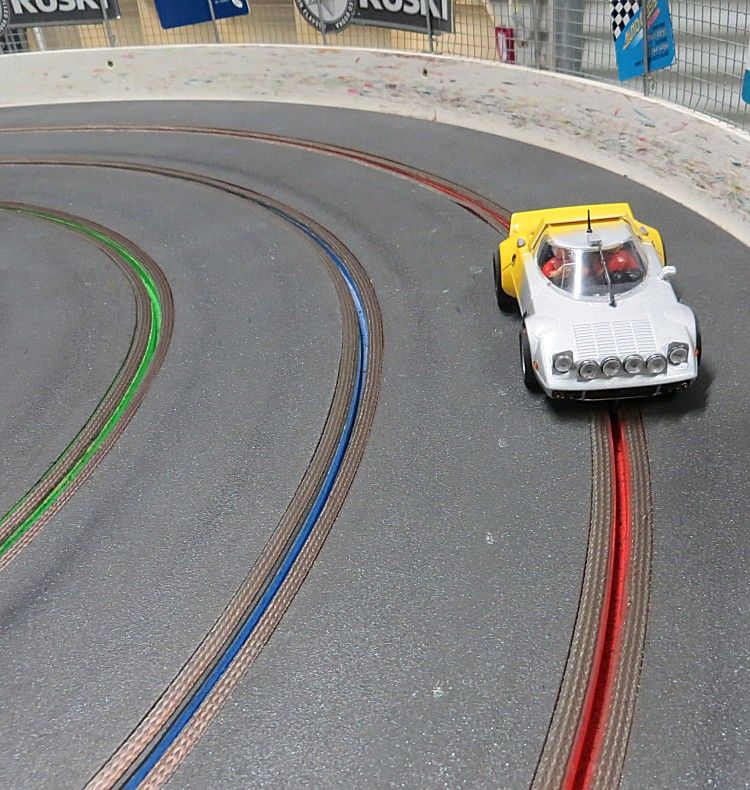
So that was it, time for a photo call and between assembly periods it has already been track tested and very well it goes too. The chassis has a couple of cylinder magnets which come with the kit, but they are vestigial at best and you would need to grind the tyres back to the hubs to achieve any useful sort of downforce. So all that is now required is for someone to have an NC1 rally event boys!! then perhaps me and Eggy could have our own race within a race.
I will not suggest this model was easy, because it wasn’t. Continual setbacks robbed me of enthusiasm for it more than several times. It tested me at every sitting and now it is finally finished, I have made sure it will drive properly even if it kills me. If you are thinking of building the Teamslot Lancia Stratos, be warned, unless you are prepared to subject yourself to extreme slotcar anguish.....don’t bother!